Host static website on Azure Blob Storage
You created a simple static website or even SPA application and then you want to host it somewhere? There is nothing simpler than that! (BTW. This blog is also deployed this way!)
Table of Contents⌗
Prerequisities⌗
- Account on Azure Portal with Subscription created.
- Account on GitHub
Simple website⌗
-
Navigate to Azure Portal and create new
Resource group.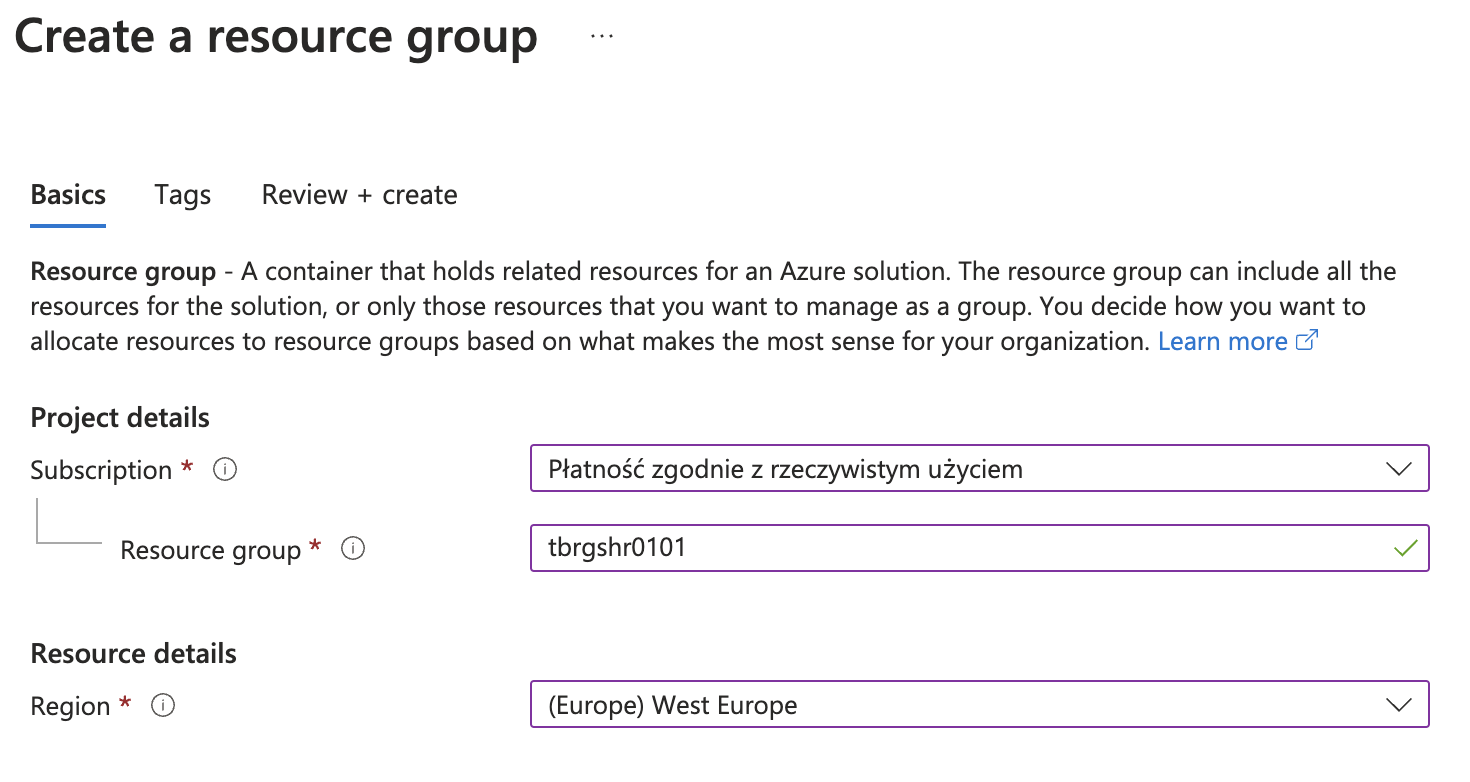
Naming convention for resource group which I used is following:
- tb - first letters of my project
travel blog - rg - first letters of resource name
resource group - shr - shortcut for
shared - 0101 - unique identifier
- tb - first letters of my project
-
Inside this created Resource group, create new Storage account.

You can left all settings as default or customize it for your needs. Very important thing is to allow authenticate to Blob Storage using access keys, because otherwise you wouldn’t be able to automate whole process of website deployment.
-
When storage account is created, go into this resource and on the left sidebar select
Static websiteand set following settings: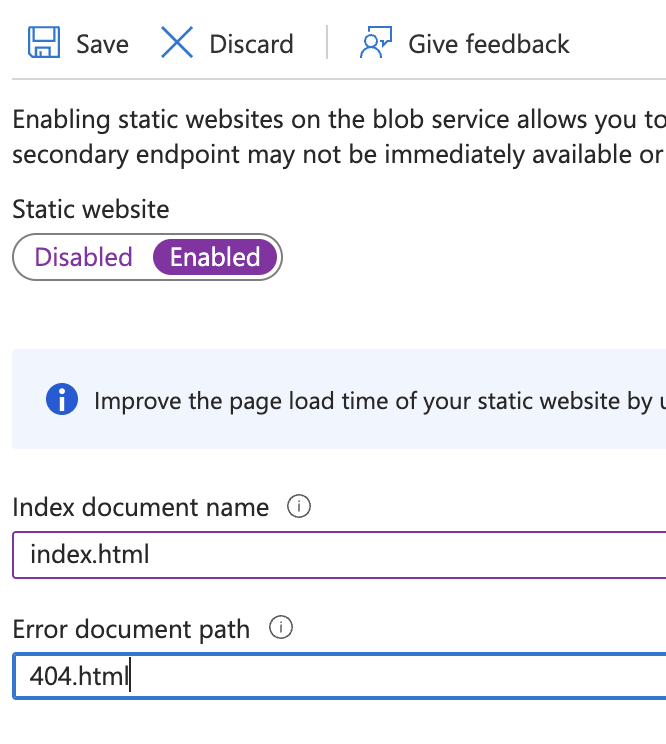
After enabling static website, we can see endpoints which will allow us to access the website.
-
To test the static website, we need to upload test files. To do that select
Containerson the sidebar and select$webcontainer.
-
Upload following files:
-
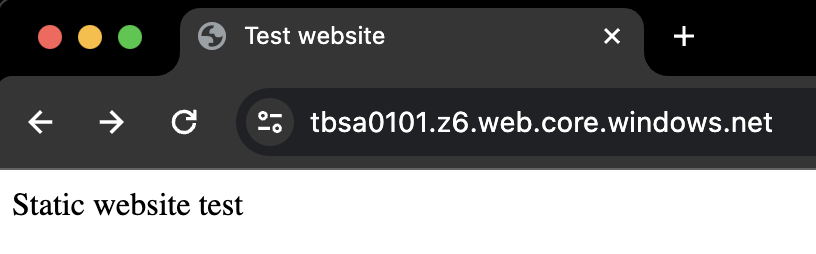
index.html- entrypoint for whole application<html> <head> <title>Test website</title> </head> <body> Static website test </body> </html> -
404.html- file which will be displayed when someone would navigate to page which doesn’t exists<html> <head> <title>Not found</title> </head> <body> 404 - page not found </body> </html>
After uploading, navigate to the endpoint and see if that works.
-
main page
-
dummy page to test 404 subsite

-
Automate the deployment⌗
For now we have our simple website uploaded and working. But let’s assume we don’t want to upload all files manually every time we do some changes. Especially when the website is SPA application. To do this, we will create a new Github repository and then create a workflow file which will upload all changes automatically when changes will be pushed into main branch.
-
Create a new Github repository, with following folder and files structure:
📦 repository ┣ 📂 .github ┃ ┗ 📂 workflows ┃ ┗ 📜 workflow.yml ┣ 📂 src ┃ ┗ 📜 index.html ┃ ┗ 📜 404.html -
Open repository settings, then navigate to
Secrets and variables,Actionsand add a new secret namedCONNECTION_STRING. Value of that secret is the connection string to the Blob Storage.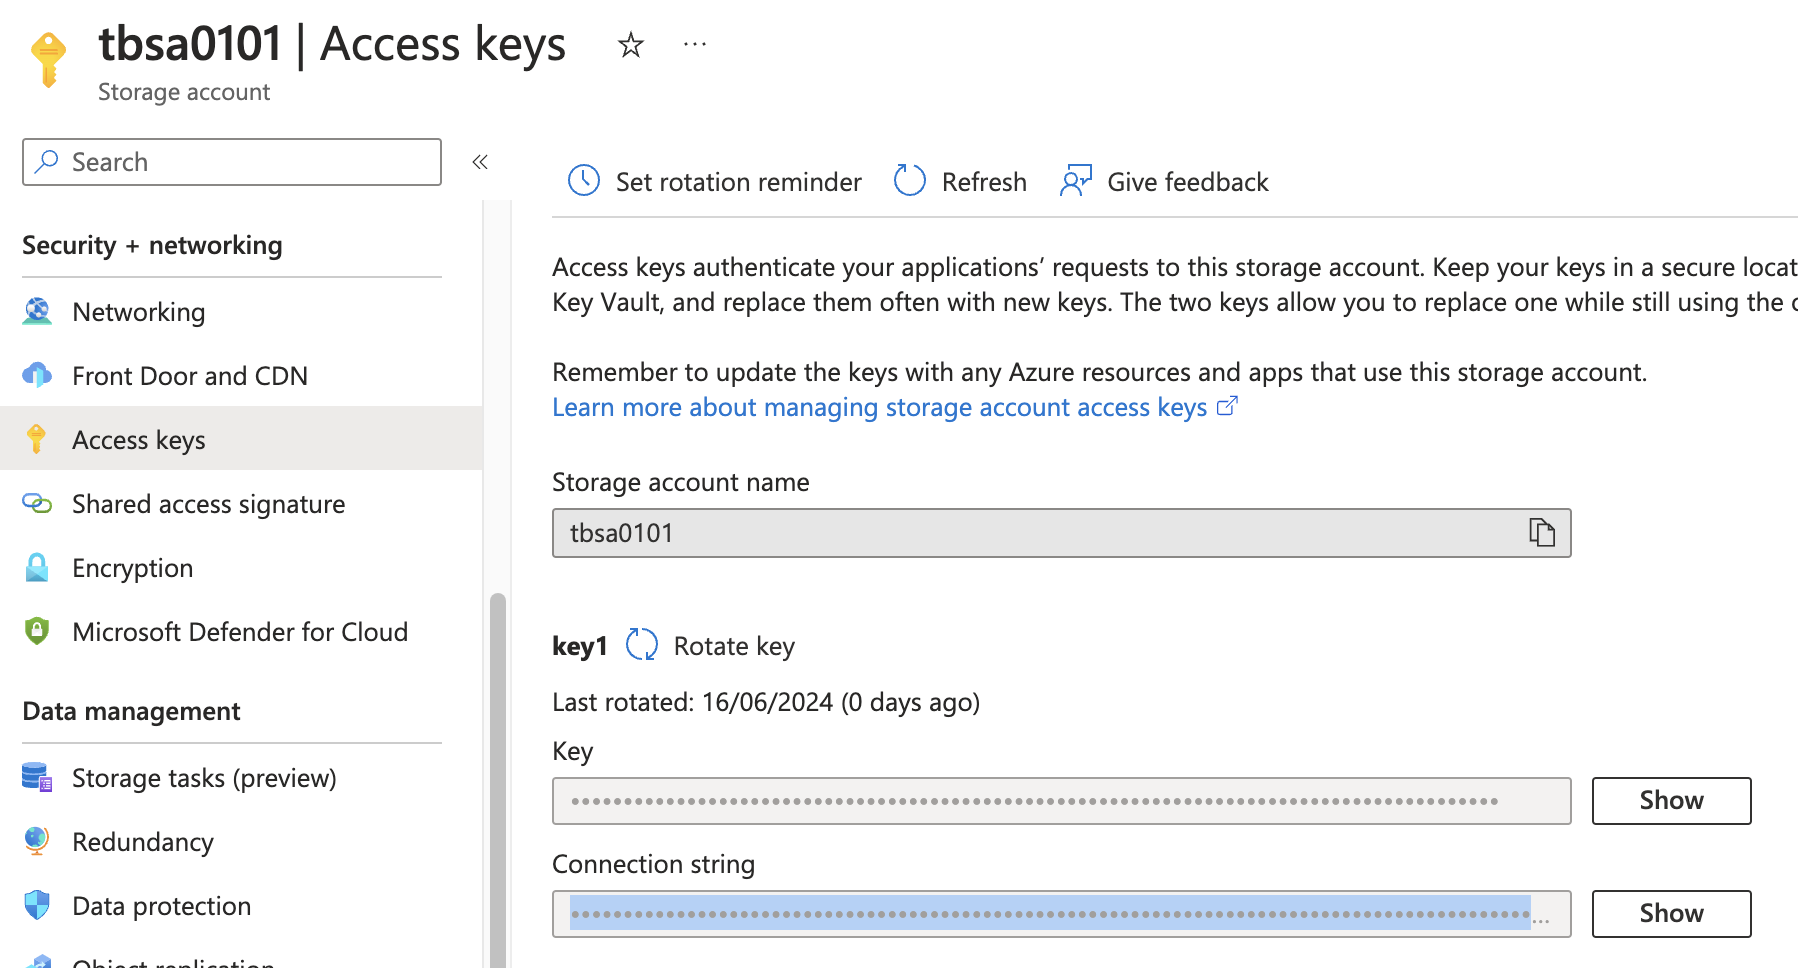
-
According to the structure, inside the
.githubfolder we should haveworkflowsfolder withworkflow.ymlfile. Paste following code to the file:on: push: branches: - main pull_request: types: [closed] branches: - main jobs: build: runs-on: ubuntu-latest steps: - uses: actions/checkout@v1 - uses: actions/setup-dotnet@v1 with: dotnet-version: '3.0.100' - uses: lauchacarro/Azure-Storage-Action@92250565adefe3844ab7e135cb570ca354f0ac18 with: enabled-static-website: 'true' folder: 'src' blob-container-name: '$web' connection-string: ${{ secrets.CONNECTION_STRING }}Everytime when any change will be pushed to the
mainbranch of the repository, it will be synced automatically using GitHub actions to the$webcontainer in our Blob storage. There is a need to use a specific commit of thelauchacarro/Azure-Storage-Actionpackage because the newest one has issue with connection to Blob Storage and doesn’t work. -
You can preview all the actions in the
Actionstab in your repository and also check details of every deployment.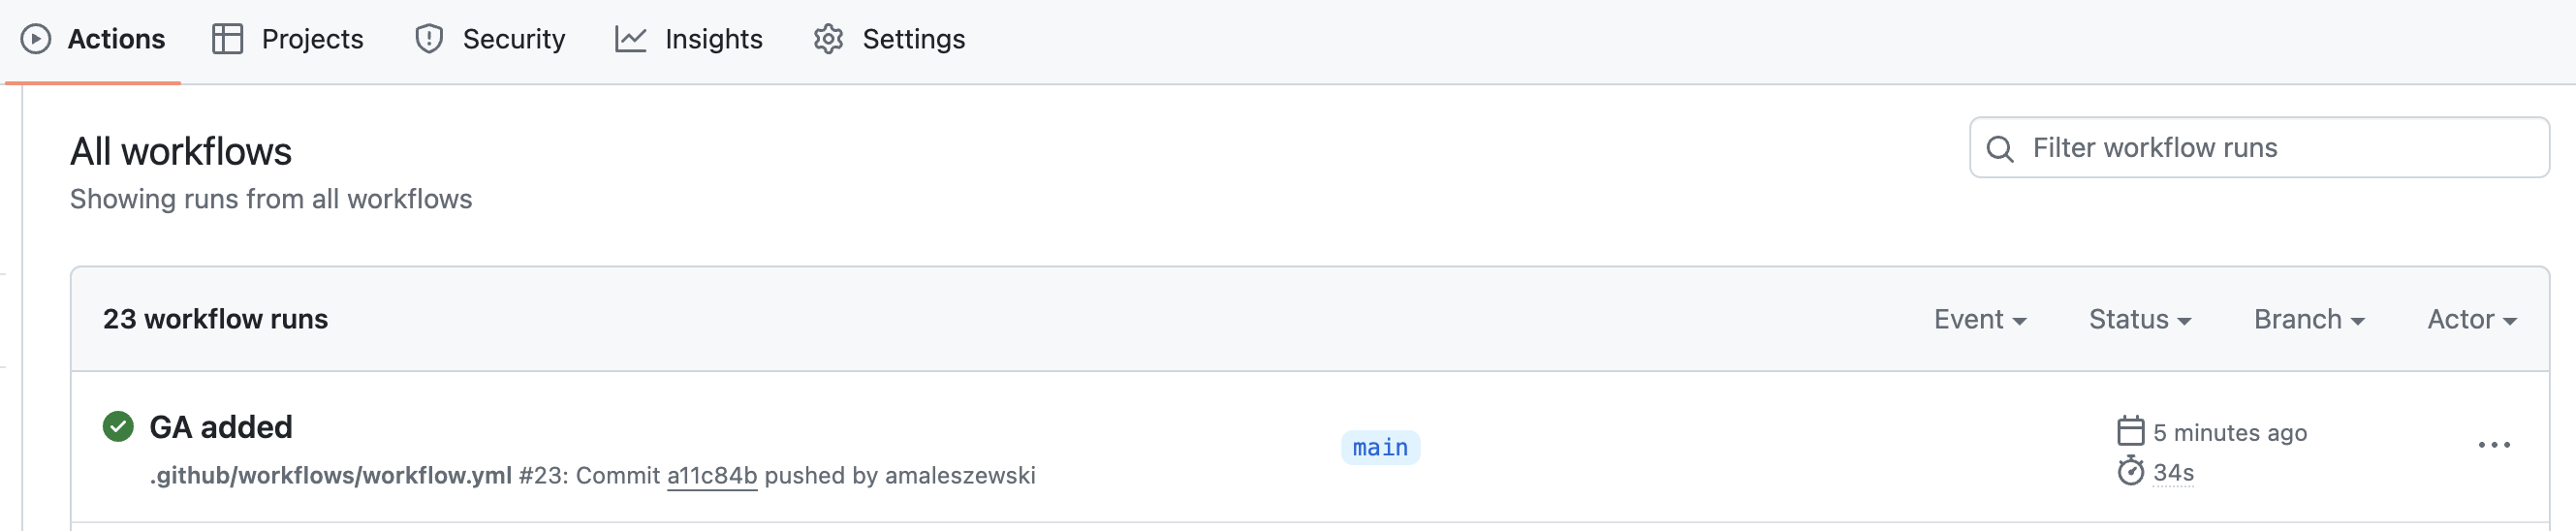
Summary⌗
In this tutorial I tried to explain a simple scenario for static website deployment, but could be used also for deployment of SPA applications or a static blogs - like this one - which uses Hugo for content creation. In case of more complicated scenarios, you always need to deploy your output which is a built source code, instead of raw source code.
If you have any questions, don’t hesitate to leave a comment!
In a next blog entry, I will describe how to create a nice DNS entry for our website (ie. tive.pl), instead of using that generated one alias for Blob Storage (your-storage-account.z6.web.core.windows.net) and also tell something more about costs, which are almost none.